Showing posts with label Nitriding. Show all posts

Tuesday, 29 October 2013

Over The Handlebars

My shedweek has been spent contriving a plating tank so I could plate the handlebars. This has been going on for so long now that I'm a little tired of it, I'm pretty much over the bars. As I mentioned last time, my previous attempt was an utter failure. This time I decided to plate each half separately to try and make the job slightly easier. The depth of the drop of the grips and the geometry of the head mean that a simple square cut tube will not work, it's not possible to get the handle bar fully immersed in the solution. When I picked up the tube from Pete, I mentioned this difficulty and he simply suggested that I cut the tube at an angle and mount it off vertical. Clearly Pete's not as dumb as I look as this turned out to be the winning answer.

A little trig. to calculate the angle of the cut and then recycle the 
failed polythene tank into a little stand for the tube tank. 

With the tube mounted it looks like a big fat mortar. 

The tube is 150 mm diameter cable conduit and the end cap is stuck on with evil smelling PVC glue. I tested this before hand and it was absolutely watertight. I wanted to plate both halves on the same day so that the conditions would be the same and the resulting finish would be the identical. This meant waiting until the weekend and getting up early. In the meantime I used the same tank to plate the brake lever and the trouser guard.

The contrived set up looks a lot like a Heath Robinson drawing

Try to imagine where the submersed handlebar is compared to the other side and you can see the difficulty obtaining a tank to completely cover it. The central part of the head is masked by paint, only the bars are plated.

Now that the bars are done I can soft solder the trouser guard into the head. To ensure that it is in the correct place I installed the wheel again. This meant I needed to protect the tyre and rim from the heat. I wrapped a wet rag around the tyre and then used 4 layers of old baked bean can steel to act as a heat shield.

Baked bean can heat shield.

This worked well and the tyre and rim paint are undamaged.

The neck was also plated at some point in the last two weeks but I'm old and I can't remember when I did it. Again, the area to be plated was masked with paint. Also at some point in the last two weeks I've had all the bits nitrided that require hardening. I'm still polishing these and I'll plate them in the coming week.
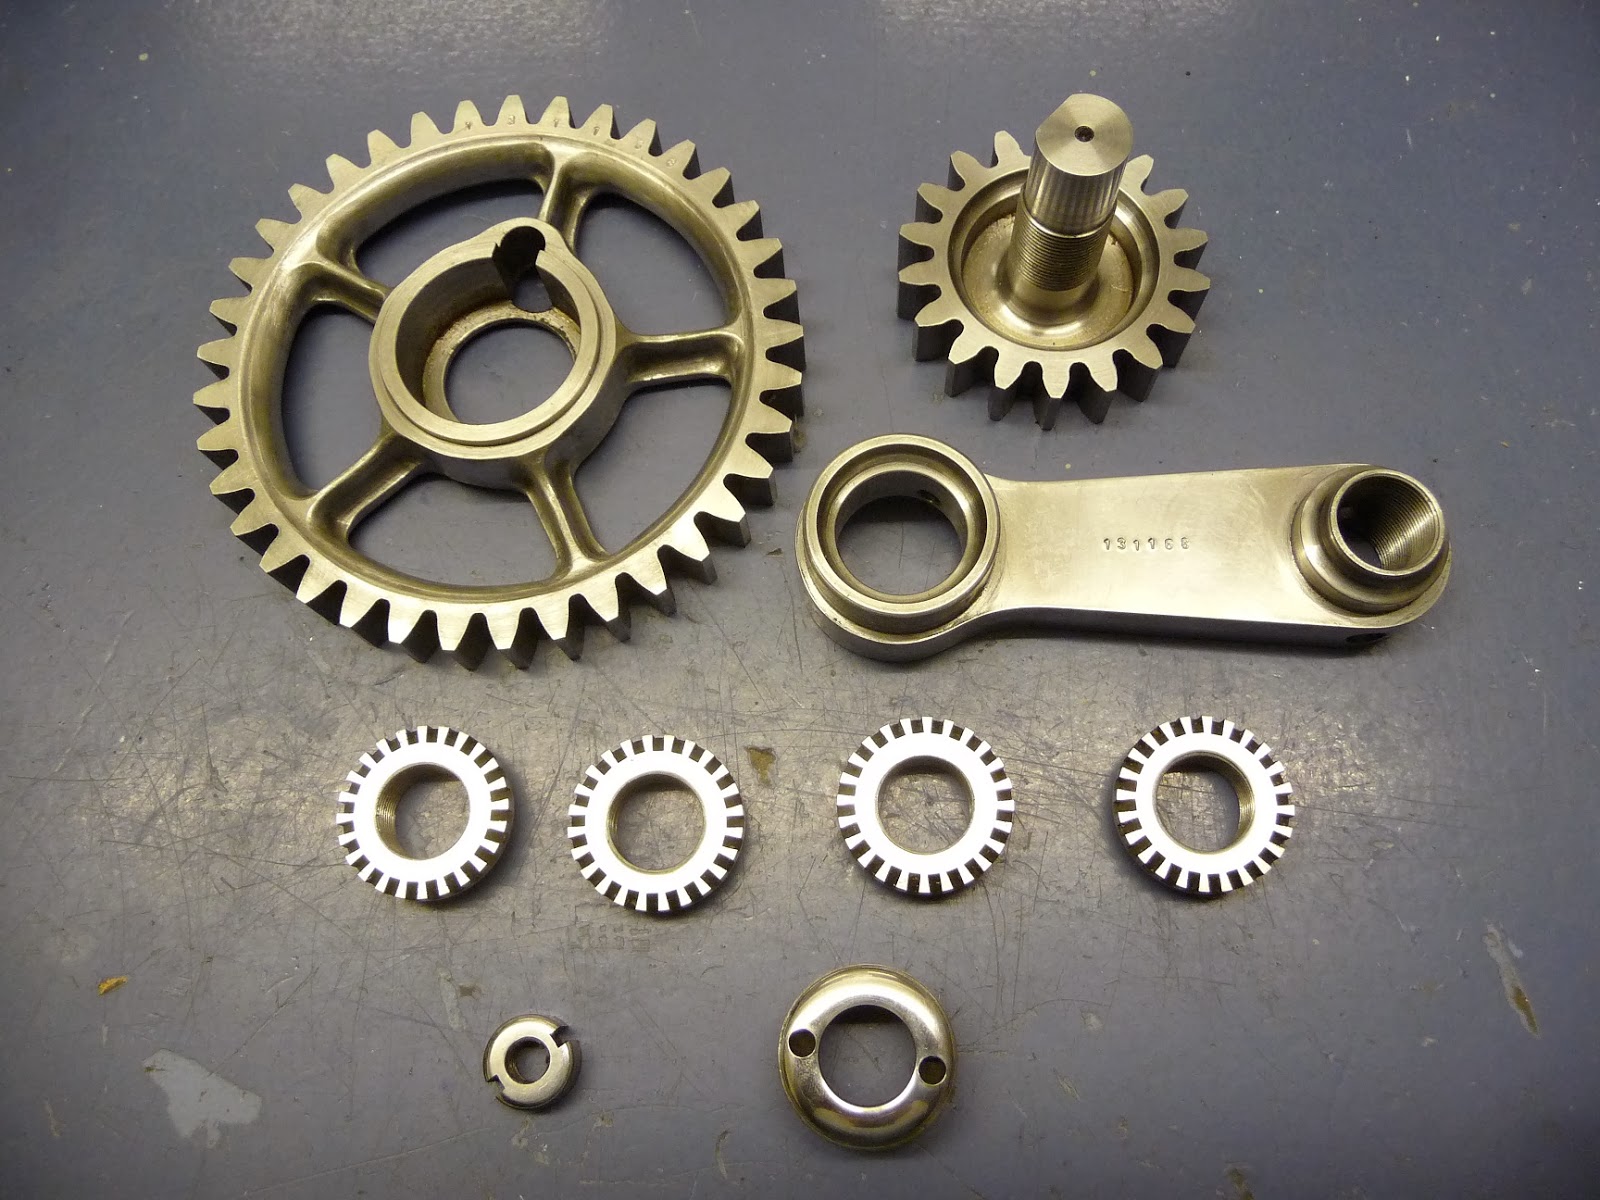
Before nitriding, afterwards they go an interesting blue colour.

I'm now at the point where I can prep for painting and then wait for a spell of decent weather.

In other news the deck is very nearly complete, I've screwed the actual decking on to the joists rather than use nails. My tendonitis wouldn't cope with hammering 3500 nails very well. I'm only about 8 metres of decking short which isn't too bad considering that I bought 750 metres to start with. I've been borrowing an 18v cordless drill from Dan, a fellow member of our pub quiz team. It has made the job so much easier. All that really remains to do is to stain the bare timber, I'll be leaving the choice of colour to my lovely wife (resident soft furnishings expert) for obvious reasons. Doing the deck myself has had a significant impact on the facile project, I hope to get back into production properly next week.

In more other news, my whanau spent the long weekend up in Nelson. We caught up with Mr. Middleton and his family and had a most enjoyable meal and evening with them. I failed to find anything to steal from his shed, I was hoping to locate a set of Westwood rims but it was not to be.

I took my mountain bike up to Nelson and on the Saturday morning I did a little ride up into the hills. The Dun Mountain track is wasome and even more wasome when I discovered that the first half follows the bed of the first (horse drawn) railway in NZ, towards the top you ride over some of the original sleepers from the 1860's. It was cold and windy at the top (878m) so I pulled my jacket out of my pocket. At this point I must have dislodged my brain as I descended like a complete twat (again) and had a minor off. I don't seem to learn do I? Just a bit of gravel rash and a hurty knee this time though. So this week I actually was over the handlebars.

Later, driving into town for dinner, my lovely wife in our car and my in laws in their car got caught speeding. Being a long weekend it is zero tolerance and she got fined $30 for 58kph in a 50kph zone. She was very sheepish but I didn't say a word, I didn't need to. The fine will have to come out of her shoe allowance. It's the only way she's going to learn.

Wednesday, 9 January 2013

It all comes together


As mentioned last time, I wanted to get all the outstanding brazing work completed before I went back to work in the new year. I'm now back at work but I'm pleased to say that I did manage to find half a day to go and hire the oxyacetylene and get the bits stuck together.

I'd accumulated quite a pile of bits ready for brazing and it was good to get them all attached to each other at last. There are 5 sub assemblies to be brazed:

The new bolts into the cantle plate.
The bolts into the spring carrier
The saddle post clamp
The lever pivot castings to the end of the fork legs.
The individual handlebars into the head and attaching the brake lever pivot.

I only made jigs for the handlebars and the lever pivots, the remaining assemblies being too simple to require holding, this proved to be a mistake as I'll explain later.


The handlebars and brake pivot are held in the correct locations with some very special frame building pins - old nails. unfortunately, I drilled the holes very slightly too large and the pins have a tiny amount of movement, this meant that the individual handlebars could move relative to each other and could end up not being aligned. I solved this by zip tying the bars to a thick sheet of MDF to maintain the alignment.


The lever pivot jig needed to be more complex and accurate, the pivots need to be concentric, parallel and correctly spaced relative to each other. They also need to be parallel to the main bearing housings. I recycled the old jig used to braze up the main bearings and with suitably machined spacers I was able to hold everything securely in the correct locations. I had to be careful brazing these castings as I had already had them nitrided and I didn't want to affect the hardness of the bearing surfaces. My idea was to use a large lump of steel as the spacer, this will double as a heat sink and hopefully prevent the inner races from getting too hot. I also tried a new brand of 45% silver solder this time, this has a lower melting point and should flash in quite quickly. I intended to go in quickly with a hot flame and spend as little time as possible heating the castings.


As always the first job is to thoroughly clean and degrease the surfaces to be brazed and then flux and assemble into the relevant jigs. The actual brazing went really well and the lever pivots are firmly attached and still hard after the heating. I've only cleaned up the handlebars and lever pivots so far, the saddle components have yet to be done.


For the first time I can now assemble all of the parts made to date. The sun gear still has a lot of material to be removed and the planet has nothing to attach to yet. The total weight at this point is 33lbs 14oz (~15.4kgs) which is on target as per an original.


It is great to have the basic bike together after all this time. As I mentioned before, I didn't use a jig to hold the saddle post mount and consequently it has come out at the wrong angle. It's only 5 degrees off but it will affect how and where the saddle sits and to my eye it just looks wrong, it not being parallel to the fork legs. You may remember that I wasn't completely happy with it when I machined it up. I'll make another one at some point.

Next week, I'll continue with the saddle.

In other news, we've had a little weather this week. It's been quite varied with snow on the Lindis Pass, very heavy rain on the West Coast that took away a few bridges, a tornado in Ashbuton and very hot Nor'West days like today. It's almost like we've had 4 seasons in one day or something. Hey, somebody should write a song about that.

Saturday, 28 January 2012

Harden the four cup(s) *

I've been able to get out in the shed a little this week. Enough to fettle the rear hub from a bar of 4140. When I checked the drawings I had made back in 2008, I was certain that I'd made a mistake measuring the original and that I'd got the dimensions too small. I even checked a couple of 1890's front wheels I have lying around which confirmed that the measurements were correct. The bearings seemed tiny when compared with the large front wheel bearings, but are exactly comparable with a modern front wheel.

The first task is to make the hub shell, this uses the same techniques as in the front hub just on a smaller scale and with fewer bearing surfaces (!). There is no need to mill key ways to lock the gunmetal flanges in place since the rear hub transmits no torque. In practise I have found that the spoke tension will adequately hold the flanges in place, however I will either make them an interference fit or soft solder them on as was the norm back in the day. The oiler hole is tapped at 2BA, I'm happy using BA threads since they were first formulated in the 1880's and I have previously found them on antique bikes.

The next job is to make the cones, the fixed (right) cone is left smooth but the adjustable (left) cone is knurled with a straight, fine pattern. My knurling tool has diamond pattern wheels and with the shocking local price of replacement wheels, I've milled 80 'knurls' instead of rolling them.

Roughing out one of the cones

Parting it off.

Machining the outside face.

Milling the 'knurls'

The hub spins beautifully on it's 11 x 3/16" balls in either race. 

I've calculated a formula for the dimensions of the race based upon the number and size of balls required, this has worked out well so far although the formula leaves no room for a gap in the balls which they need. You can either add one to the number of balls (n) or just add a smidgeon to the calculated value D. I have found that making D larger by 0.020" or so is enough to get a useful gap. The calculated value for D in the rear hub = 0.1875/sin(180/11) + 0.1875 = 0.853". In practise I machined it to 0.875" and have a sufficient gap, as can be seen in the above photo, so the balls don't bind.


With all the steel components of the hubs now complete, I can get them heat treated. I initially chose 4140 steel because of it's suitability for nitriding which produces a very hard surface case up to Rc 64 but retains the tough centre. Nitriding will also cause far less distortion due to the lower heat required. SSM have a local office so I gave them a ring in the morning and was told that if I can get the parts to them by 10 o'clock they could put them in today's batch and I could pick them up in the afternoon. A fantastic service, I'm sure you'll agree.

The parts were still warm when I picked them up, 
like fresh hot cross buns straight out of the oven, only not as tasty. 
And a bit harder.

In other news my parents are now here and are pleased that I've been unable to organise any large aftershocks so far. My Dad is being kind to me and has only offered advice on using the dividing head to date. He sits on the stool in the corner of the workshop like a benevolent owl. I'm going to try and get the forks brazed up whilst he's here. He has far more experience than me at brazing, so I'll get him to do it and then I can examine his work. This will be the focus of my shed time next week.

We had a huge electrical storm at the weekend, It passed directly over our house and we suffered a very close lightening strike. Had I any hair remaining I'm certain it would have stood on end from the electrickery. My wife's new computer (birthday present) had it's motherboard fried and we are trying to arrange a repair on insurance. What fun. In the meantime I've resurrected an ancient steam powered computer to allow us to access the interweb and me to continue posting this nonsense.

* with apologies to Chopper Reid