Tuesday, 29 October 2013

Over The Handlebars

My shedweek has been spent contriving a plating tank so I could plate the handlebars. This has been going on for so long now that I'm a little tired of it, I'm pretty much over the bars. As I mentioned last time, my previous attempt was an utter failure. This time I decided to plate each half separately to try and make the job slightly easier. The depth of the drop of the grips and the geometry of the head mean that a simple square cut tube will not work, it's not possible to get the handle bar fully immersed in the solution. When I picked up the tube from Pete, I mentioned this difficulty and he simply suggested that I cut the tube at an angle and mount it off vertical. Clearly Pete's not as dumb as I look as this turned out to be the winning answer.

A little trig. to calculate the angle of the cut and then recycle the 
failed polythene tank into a little stand for the tube tank. 

With the tube mounted it looks like a big fat mortar. 

The tube is 150 mm diameter cable conduit and the end cap is stuck on with evil smelling PVC glue. I tested this before hand and it was absolutely watertight. I wanted to plate both halves on the same day so that the conditions would be the same and the resulting finish would be the identical. This meant waiting until the weekend and getting up early. In the meantime I used the same tank to plate the brake lever and the trouser guard.

The contrived set up looks a lot like a Heath Robinson drawing

Try to imagine where the submersed handlebar is compared to the other side and you can see the difficulty obtaining a tank to completely cover it. The central part of the head is masked by paint, only the bars are plated.

Now that the bars are done I can soft solder the trouser guard into the head. To ensure that it is in the correct place I installed the wheel again. This meant I needed to protect the tyre and rim from the heat. I wrapped a wet rag around the tyre and then used 4 layers of old baked bean can steel to act as a heat shield.

Baked bean can heat shield.

This worked well and the tyre and rim paint are undamaged.

The neck was also plated at some point in the last two weeks but I'm old and I can't remember when I did it. Again, the area to be plated was masked with paint. Also at some point in the last two weeks I've had all the bits nitrided that require hardening. I'm still polishing these and I'll plate them in the coming week.
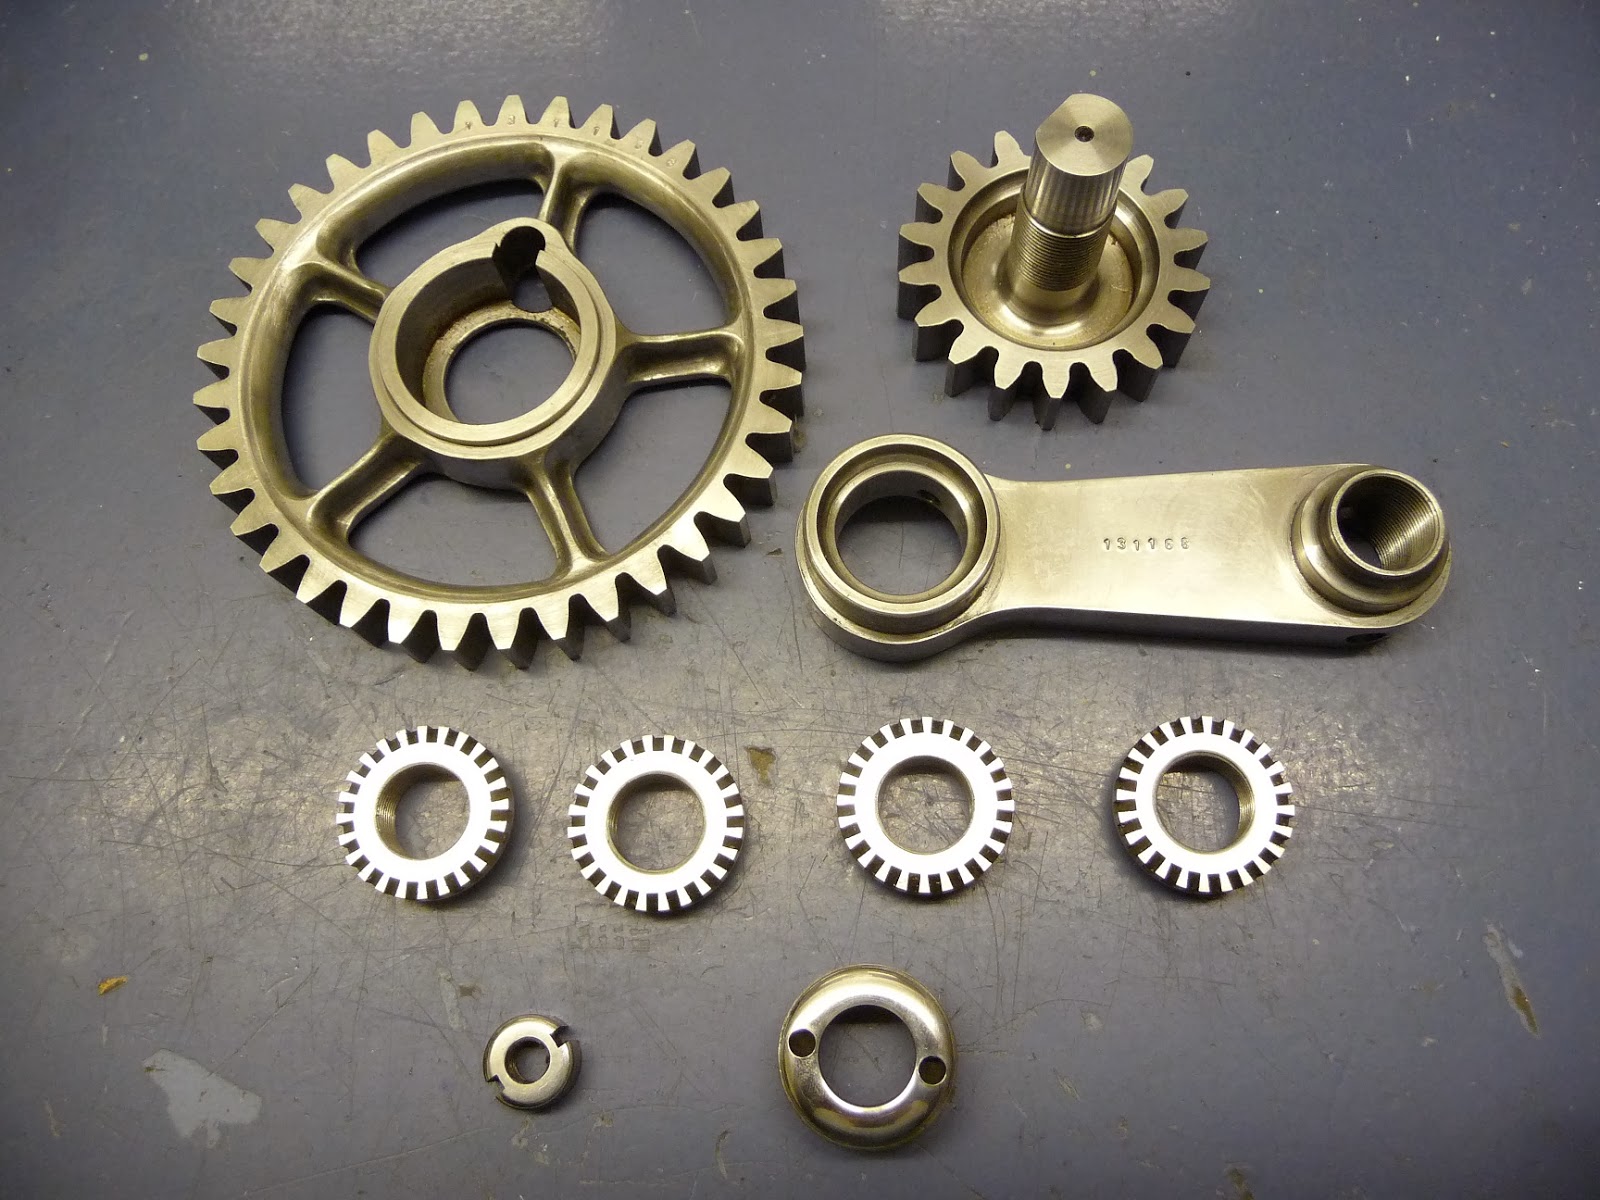
Before nitriding, afterwards they go an interesting blue colour.

I'm now at the point where I can prep for painting and then wait for a spell of decent weather.

In other news the deck is very nearly complete, I've screwed the actual decking on to the joists rather than use nails. My tendonitis wouldn't cope with hammering 3500 nails very well. I'm only about 8 metres of decking short which isn't too bad considering that I bought 750 metres to start with. I've been borrowing an 18v cordless drill from Dan, a fellow member of our pub quiz team. It has made the job so much easier. All that really remains to do is to stain the bare timber, I'll be leaving the choice of colour to my lovely wife (resident soft furnishings expert) for obvious reasons. Doing the deck myself has had a significant impact on the facile project, I hope to get back into production properly next week.

In more other news, my whanau spent the long weekend up in Nelson. We caught up with Mr. Middleton and his family and had a most enjoyable meal and evening with them. I failed to find anything to steal from his shed, I was hoping to locate a set of Westwood rims but it was not to be.

I took my mountain bike up to Nelson and on the Saturday morning I did a little ride up into the hills. The Dun Mountain track is wasome and even more wasome when I discovered that the first half follows the bed of the first (horse drawn) railway in NZ, towards the top you ride over some of the original sleepers from the 1860's. It was cold and windy at the top (878m) so I pulled my jacket out of my pocket. At this point I must have dislodged my brain as I descended like a complete twat (again) and had a minor off. I don't seem to learn do I? Just a bit of gravel rash and a hurty knee this time though. So this week I actually was over the handlebars.

Later, driving into town for dinner, my lovely wife in our car and my in laws in their car got caught speeding. Being a long weekend it is zero tolerance and she got fined $30 for 58kph in a 50kph zone. She was very sheepish but I didn't say a word, I didn't need to. The fine will have to come out of her shoe allowance. It's the only way she's going to learn.

Wednesday, 9 October 2013

Not the solution for not enough solution

I've mentioned this before, but I like to do my own nickel plating for several reasons. The first is obvious, it's hard for me to lose bits in the bottom of my tank. Imagine if you have spent something like 40+ hours on a single component and the plating shop you have outsourced to doesn't wire it securely and it falls into a huge tank. The chances of recovery are slim and none. It does happen. I also like to do my own polishing. Polishing is not a highly paid job and you can guarantee that the dude doing your polishing will not take the same care that you would. I've seen some beautiful parts ruined by overzealous polishing, the polisher trying to get a mirror finish on every surface at the expense of fine detail. In addition, I can spend the time and effort to mask the components correctly, you don't want to plate a bearing surface for example. Masking is easy, either with tape or paint, but it all adds to the time and cost if outsourced.

I only have 10 litres of plating solution at present, this is more than adequate for the usual small items like cranks and brake levers. Handlebars are slightly more tricky, particularly if they are wide and bent into interesting 3 dimensional shapes. The answer is to use a little creativity in your choice of tank. I have previously used plastic garden window boxes for long thin items, but after scouring all the local garden centres, I'm unable to find any that are long enough, skinny enough and deep enough. And don't have holes in the bottom. Obviously.

So this week I tried something that I have attempted once before but which failed spectacularly. I made a custom tank out of scrap wood and then lined it with polythene. Last time the polythene had a tiny hole in it and I lost all my solution, I wasn't happy or popular since at the time I was plating in the dining room (tiny English 2 up 2 down). My lovely wife not particularly wanting the green carpet. We learn by our mistakes and I certainly did that day.

Some quick calculations to determine the maximum dimension of the tank to give me enough coverage and clearance for both sides of the handlebars at one go. Then make the thing and line it with polythene sheet. This time I planned to fill it with 10 litres of water and leave it overnight to check for leaks. The first bit went OK, but then I turned my back for a couple of seconds and when I turned back I had 10 litres of water all over the kitchen floor. Water is easy to clean off lino so I did learn by my mistake. I also learnt that this wasn't a practical solution, the tiniest of holes or tears causes titanic failure. Luckily my lovely wife and children are away this week on holiday so I could clear up the mess at my leisure. You'll notice that there is a slight shortage of photos in this entry, this is not because my camera is funded by the US government but simply that my family have taken it on holiday...

So back to the drawing board. Pete is going to try and locate some pipe of suitable dimensions to make a tank.


In other news, my lovely wife's parents arrived from England this week. They have been whisked off to Wanaka to stay in luxurious accommodation while I work on the deck. I'm beginning to dislike the deck. I managed a full 20 hours at the weekend on it and I ache all over. It is also raining now, so I can't work on it as planned. I'm also taking the opportunity to grow a beard as a nice surprise for when she gets back. This has nothing to do with being less concerned about personal grooming when my primary caregiver isn't present.

Friday, 20 September 2013

Trying to guard your trousers

I've had a disappointingly light shedweek, but I have managed to find a little time to make the trouser guard. Our American friends, who aren't as good at sailing as us, call it a pants guard. When I bought my first original penny farthing about a hundred years ago now, I thought this part was a tyre scraper to help prevent headers from stones getting jammed under the head. I was wrong and discovered the truth when I first rode the bike around a bend on a muddy road. As the wheel is steered to one side, the guard prevents your trousers, or leg, from getting abraided on the mucky tyre.

The guard on the original is a full 12 inches long, much longer than on a penny farthing. This is a reflection of the relative safety of the design, the seat being that much farther back and consequently the guard needing to extend farther back to be useful.

The original guard is bent and mangled, it is probably made from the mildest steel.

Due to the extra length of the guard, the material it is made from is important, it needs to resist bending as your leg contacts it. The obvious choice is spring steel, the same material I used for the saddle rails. Here's a tip if you need a small amount of spring steel rod, you probably already know this but you're cleverer than me and I didn't. Model shops sell it in many diameters as piano wire or music wire. It comes in 36" lengths and is cheap and easy to find. The original guard is 3/16" and this gauge is considerably easier to bend than the saddle rails.

First bend two 90 degree bends at the appropriate places.

Then squish in a handy bending jig to produce the rounded end that wraps the tyre. 
Also bend the guard to follow the tyre.

Next grind the rounded end into a pleasing flat profile.

Then the tricky bit, drilling the holes in the fork legs. 
drilling into a convex surface requires a little care to prevent the drill wandering. 
I mounted the fork legs onto the mill table and milled a flat before drilling the hole. 

A little tweaking to get the guard in the right place and at the correct angle.

I still need to heat treat the guard to remove the residual stresses from bending but I need to wait for my lovely wife to go out so I can bake it in the oven at 200 degrees Celsigrade for an hour. I'll then plate it and soft solder it into the forks before I paint them.

She nipped out tonight but caught me when she got back. 
I think I got away with it. I'll let you know next week.

So that's now the frame completed, there is nothing left to do other than stamp the serial number all over the components. Next week I'll start plating some bits and pieces and begin to prep for painting. The weather is rapidly improving here and I should be able to spray the enamel fairly soon. I do like this time of year, we're on the steep part of the seasonal sine wave and the improvements in daylight hours and temperature are rapid and noticeable.


In other news, today is our wedding anniversary, we have been married for ages now. I had hoped to have completed my lovely wife's deck but it was not to be. I'll post a picture when I've got it done, it has turned into something of an ordeal. My lovely wife visited relatives across the ditch in Sydney last weekend and I worked all the daylight hours possible to try and finish it while she was gone. I failed but I did earn considerable family credits for trying. She says I'm often quite trying, now I think about it.


Thursday, 12 September 2013

On Guard

As promised last time, I've spent my shedweek making the gear guard.

The original guard.

From the literature of the day, the sole purpose of this gear guard is to protect the gears from mud, stones and other debris thrown up from the unsealed roads of the day. By all accounts it was very effective. One reviewer mentioned that he threw a handful of mud at the guard just to see what would happen. It mostly got deflected and what did hit the gears apparently just got squished out. The guard is not designed to protect fingers belonging to inquisitive, small children. The Victorians were unconcerned about such things, at that time common sense was still reasonably common. You lived or died by your wits, unlike today where the government of [insert country of residence] manages your health and safety on your behalf. But I digress.

I did consider making a one off rolling machine to make this guard and also the rear mudguard. I decided against it at present although I may review this later.
So a quick scratch of the head and then get cracking. I approached Autobend again (they did a sterling job bending my handlebars if you recall all of that brouhaha) and enquired about bending some 1.375" thin wall mild steel tubing into the correct radius. "No problem" they said, as long as the correct centre line radius is 101mm (I think they meant 4" but I didn't argue).

By a staggering stroke of good fortune, that is exactly the dimension I require, which was nice. 

So starting with a 180 degree bend, the first thing to do is to make an indent on the bottom of the guard. This is so that the guard sits vertically when bolted to the upper and lower fork legs. The upper legs are angled in towards the head and the difference is taken up by this little indent.

Note the little cut out opposite the hole to allow a screwdriver access.

I've mentioned before that I don't like hitting stuff, I prefer squeezing in a controlled fashion so I made a little hard wood insert to go up inside the bend, this has the indent cut into it. All I need to do is then squeeze it in the vice with an external form of a suitable shape.

An indented hardwood plug...

...getting squished in the vice.

Next I need to chop out the inner part of the bend. This is not easy as you can't use a hacksaw, so I bolted a guide to the drill table and drill a series of holes around both sides. A combination of a junior hacksaw and a cut off wheel in the Dremel soon parted the two halves. I was mildly concerned that the radius would change when I removed the inner half of the bend but it stayed exactly the same.

I tried but couldn't get a tune out of this.

At this point the guard is very difficult to hold in the vice without damaging the shape. The answer is to make a suitable clamp from some scrap MDF, this has the curve of the guard cut out with a coping saw and then the inner part radiused slightly so that it sits inside with altering the shape when it is clamped up in the vice.

Cleaning up the edge with an angle grinder back to the marked line.

Then to finish the actual shape of the guard just profile the ends and tidy up with files.

Now to mark out, cut and bend the top mount, this is a reasonable simple affair.

The shape of the top mount.

Bent to shape.

Next job is to establish where the guard is going to sit on the fork legs, it has to be concentric with the sun gear so that the planet is always equidistant when purring round. Once again a little scrap of MDF with the outer radius of the sun and the inner radius of the guard cut out proved jolly useful.

The hole and the cut out are to allow me to scribe positions on the fork legs


The top mount gets riveted to the guard in the correct marked position, I use nails for rivets. My son is 12 and is now taller than me, has much bigger hands and feet and is estimated at current rates to stop at 6'6". I figured it was time he learnt how to rivet, hammering being really bad for my tendonitis at the moment.

The original riveted top mount.

My son's attempt.

I cleaned up this side.

Not bad for a tyro. He already has dibs on this bike, "When you die, can I have this?" Charming isn't it? Just because I've got a gammy hand and fewer teeth than he has, he's already started putting labels on my stuff. Sounds familiar eh Dad?

Then using the MDF jig I can mark out the holes for the screws to bolt the guard to the fork legs. The steel of the fork legs is pretty thin and even with BA screws, the thread count in use would be tiny if I just tapped the threads directly into the tubes. So I didn't, I made some little bosses, just like water bottle bosses, and silver soldered them in.

That's Boss as my kids say when describing something which meets with their approval. 
Honestly, I'm so down with the kids it scares me sometimes.

Make the holes a loose fit and braze them in. I needed to dismantle the bike to do this, it took me an hour and a half and I had quite a pile of bits on the work bench at the end.

I bolted the legs up to prevent movement as the heat is applied.

File flush so that when it's painted only you and I will know.

Finished, and no I'm not going to put it all back together just for a photo. 

I have two more holes to drill for the trouser guard, which I'll do next week.

While I've got it all apart I'm going to harden, plate and paint what I've made so far, studying the photos and my notes of the original, relatively little was plated. Each side of the handlebars, the brake components, the two gears and all the nuts and bolts are plated. Everything else was painted including the crank, con rods and levers. More later.


In other news, we've had a little storm this week. I read on the interweb (so it must be true) that we had 250 kph winds, the strongest on record. Apparently the storm was the worst since 1975 and the second worst ever. I thought our house was going to flat pack itself, we lost power and our trees lost limbs. The morning dawned beautiful, calm and smelled fresh and clean. Commuting in to work took ages due to the many trees down across roads. My lovely wife teaches at a rural school and she's still not able to get to work. They have no electrickery yet anyway.

Monday, 2 September 2013

Purring Gears

You didn't know that gears could purr did you? Neither did I until my daughter came into the shed whilst I was idly playing with the fruits of this weeks labours. She told me that they sounded just like her cat, Flabby Tabby, when she's purring really loudly. "That sounds just like Flabby Tabby when she's purring really loudly" she said. But we're getting ahead of ourselves.

So clearly, this shedweek I've been finishing off all the little bits and pieces needed to complete the gear assembly.

The first job is to drill and ream the holes through the cranks and live axle for the taper pins. I found a local company that had a taper reamer of the right size and upon enquiry sold me a handful of matching taper pins. Hoorah. The taper on these imperial sized pins is 1:48 or 1" in 4'. In practise this means that a hole goes from too small and you can't get the pin started to too big and the pin falling through very quickly. It is very important not to mix and match imperial and metric pins as metric tapers are 1:50 and the two are not compatible.

The first hole is the easy one as it is in left hand crank which is tightened up to a shoulder on the axle so there is no adjustment needed. Drill through with the appropriate size drill and then hand ream the taper, checking periodically that the hole isn't getting too big. I need enough of the small end poking through that I can cut a thread on to secure the pin.

Another shockingly bad photo, this time of hand reaming a tapered hole.

The hole through the right hand crank required a little more thought as the cranks need to be exactly at 180 degrees to each other. By fiddling around with shims and scrap plate steel I was able to come up with a combination that sat flat in both orientations thus guaranteeing that the cranks were aligned correctly.

The right hand crank was locked with a lock nut and the hole drilled and reamed.

Fitting the taper pins.

Next mark the taper pins to cut the thread and shorten to length. Which raises an interesting problem. How do you grip a taper in the chuck? My solution was to make a little doo hickey to assist me. I drilled and reamed another tapered hole in some scrap bar and then split it with a hacksaw. Each taper pin can then be inserted, lightly tapped in and when the chuck is tighten up, it grips the taper very well but still makes it easy to get out again.

A split doo hickey with a tapered hole, yesterday.

Trim the big end and cut the thread on the little end.

Next make the locking tab for the live axle bearing adjuster. As before I only briefly considered machining it before I came to my senses and hand filed it. The recess is milled, it turned out that this was the last time I used my Myford machine vice...

Hand filed locking tab.

Myford machine vice shortly before it died.

Next drill and tap the hole for the oiler in the left hand crank arm. The placement of this is critical, too far inboard and it will foul the planet gear and too far outboard and the thread will break through to the bearing surface.

A little care with the edge finder and then using the mill as a drill.

Before tapping the hole at 2BA for one of my oilers I made previously.

Note I had to use a different machine vice as my lovely Myford had an unfortunate accident. When tightening it up the screw just kept turning until the end popped off.

You can see from the oil ingress that it has been cracked for a long time. 

I will mourn this, it was in almost new condition when I got it, I even still have the box for it. Now that the original Myford company is no more, my chances of replacing it are slim and none. Anybody have an unmolested one they'd like to sell me. Seriously, I'll pay a fair price for one. And btw, I didn't make those holes in it either, that was a previous owner.

Finally, I just need to stamp the patent info into the left hand crank arm as per the original.

I used my same techniques as before and it went well...

...although the N on the second line is double struck for some reason. 
I'm unconcerned as it shows the hand made nature of these things.

Then I can reassemble everything again for a photo shoot.

Right hand side compared to the original.  
Use your skill and judgement to spot which is which.

Left hand side not compared to the original as I don't have a photo of this assembly. 
I've jammed a wedge into the gears to stop the crank hanging down, just so the text is visible.

A gratuitous photo of the complete progress so far. 

Total weight at this point is 37.7lbs which is possibly very slightly heavier than an original as per the catalogue. Although I read an interesting comment from 1879 today. Henry Sturmey was complaining that manufacturers weren't truthful with their quoted weights and from now on he was going to weigh each machine he reviewed himself. Nothing changes I guess.

Next week, I'll start work on the gear guard. I need the gear assembly to be complete for this, then I can dismantle it all again and get all the components hardened. I seem to be rapidly running out of bits to make. I'm still unsure how to do the levers though.


In other news, I've caught tendonitis in the back of my right hand. It is most painful and I'm unable do anything with it, even the simple action of using a screw driver is out of the question. Fortunately the pain from my removed wisdom teeth is mostly masking this. My hand does mean that I can't even ride a bike at the moment, I'm going insane. And getting fat.

In more other news, this last week my father acknowledged a rather unusual anniversary. It was 50 years ago that he was knocked off his Matchless G3LS by a less than attentive driver. His injuries have caused him much trouble over the intervening years. This is clearly where I get my excessive grumpiness from.

Exactly 50 years previously, to the minute apparently, this spot was a less than happy scene. 
Hey, I pinstriped that tank.

Last weekend I took the family down to Lake Tekapo for an end of winter break. the kids loved the snow tubing which is a little like an icy Brooklands negotiated on large inner tubes.

Apparently it was just as bumpy too. 

We did some excellent local walks which the kids were less keen on. However a quick game of rabbit poo snow balls soon encouraged them along. This is an unfortunate side effect of making snow balls at the end of winter when the snow cover is very thin.

Sunday, 25 August 2013

Lacking Wisdom and Getting Cranky

My lovely wife celebrated a very significant birthday this week and she is no more grumpy than usual. But that's not what I mean anyway. This shedweek I have started work on the right hand crank arm, this is a far simpler affair than the planet gear carrier but I'm not going to mention that in case I screw something up again. What with arranging the lavish parties and the parking for the convoy of trucks carrying her presents, I haven't had a great deal of free time (as usual). My brother has prompted to me update the blog though, so I'll have to take some time out from my hugely busy social life and post an entry.

The original right hand crank arm.

As before, I'm going to start with round billet and machine off one face

And then flip it over and machine the other.

Next I can saw off the thinned section and remount parallel to the ways. 
Using the same techniques as last time I can space the centre holes and 
also thin down the end of the crank to near final size.

Bolt down using the new hole and thin the centre section.

Remount on the faceplate and machine the back of the boss. 
Of course I forgot to take photos of the faceplate set up so you'll have to take my word for it.

Now mill the angled face at the back of the crank.

Then using this new angled surface as a reference, I can start to mill the relief into the front of the crank. 
This cut is at full depth so I can now get in with the ball nose cutter...

...to make the correct shape of the relief.

Mark out the shape of the crank...

...and chop it out with the hacksaw.

Finish off with hand files.

Finally mill the slot for the locking tab.

I now need to finish off a lot of little jobs on the geared assembly. The cranks need to be attached to the axle with taper pins, the locking tab needs to be made, the hole for the oiler needs to be drilled and tapped in the left hand arm and finally the patent information still needs to be stamped into the crank. All little jobs but I'll start on those next week.


In other news, my lovely wife's sister has just gone back to England after coming over for the birthday celebrations. We all had a fantastic time together and she has very warm memories of the visit. She's also pretty much back to normal after her operation a few weeks ago which is a huge relief for us.

Last Thursday I had my bottom two wisdom teeth taken out, they've been border line for the last 20 years and they finally got bad enough to need some action. I now look like a grumpy hamster but less cute. I have an interesting drug cocktail to take, some of which I'm not supposed to operate machinery with. Ho hum...

In more other news, my brother has sent me a link to a video he made of this years Benson run. The Benson run is one of my all time favourite antique bikes rides and I couldn't make it this year. If you are ever in Benson, Oxfordshire, UK on the first Sunday of July and you happen to have a pre 1928 bicycle about your person, I strongly recommend you try it.